
The Induction Site
Search this site, or just roll your cursor over the colored boxes below the pictures.Advertisement:
Advertisement:
Advertisement:
Advertisement:
“It is time to choose.”
—Wallace Stevens
Quick page jumps:
 There is a very great deal of information on this site that can help you select the induction-cooking equipment that best fits your needs, but to assure that you get optimum use of those data, here are some suggestions on how to filter down the many initial choices. Be sure you either have read or feel quite comfortable with the information on this site’s page Kitchen Electricity 101, and in particular about power—cooking power and electrical-mains power.
Your decision-making will depend enormously on whether you are simply replacing some existing electrically powered cooktop or whether you are designing a new house, or at least a new (meaning major refurbishment) kitchen. If the first, you are completely limited by the power available through the electrical wiring already in place, and largely—though not necessarily wholly—limited by the existing countertop cutout (if the countertop is formica, you are not terribly limited, whereas if it’s granite changes are harder to make). If you are in the enviable second position, you will still have some constraints, based on the allotted space in your overall design, but your hands are not tied.
The decision-making steps on this page are set forth as five simple steps:
Let’s consider them in turn.


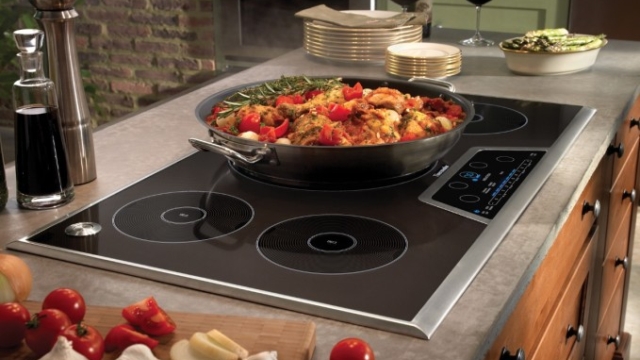
Curiously enough, with all the issues from power and features to sheer looks, the first thing you need to settle is the countertop space you want or need to allocate to your induction-cooking gear. In Europe, the kitchen-cooking-area norm—or so it seems—is roughly 24 inches (circa 600 mm) of width for a cooktop, with 30 inches (750 mm) being considered wide and 36 inches (900 mm) luxurious; in the U.S., perhaps as a reflection of the “wide-open spaces“, the norm is 30 inches and 36 inches is very far from unusual. But there are units available from 24 inches in width through 36 inches in width. But wait! (As one hears from television barkers.) The discussion so far has dealt only with integral multi-element build-in units, which tend to come in that limited, set range of widths (24, 30, 36), just as stock wall studs come in 8-foot lengths; but there are other ways to “build“ an induction cooking area in your kitchen.


There are also build-in modules that are each single elements or element pairs, and such modules (often called “domino” units) are intended for use in creating customized cooking areas. Though the one-time cost of separate cutouts is a bit higher, the extra entailed is probably small change compared to the cost of the equipment plus such base installation costs as wouldn’t vary with module count. The typical domino is from roughly 12 to 15 inches in width, whether single- or dual-element (excepting the occasional side-by-side dual, which is usually 24 inches wide). One could thus, for just one example, buy two 2-element modules and build them in with their inner edges about a foot apart, getting in consequence a 4-element, 36-inch-wide space with a nice one-foot “stripe” down the middle which one could pave with decorative tile or stone for a hot-pan holding station; as you will see, the possibilities multiply rapidly when one gives it even a little thought. Because we present all induction equipment with a cost-per-watt figure (where the data are available), you can easily see what makes sense for you. Keep also in mind that if you use individual or dual modules, you can “mix and match” powers and sizes to your exact wants and needs, perhaps better than could a maker constrained to select elements for an all-in-one multi-element cooktop.

(If you are willing and able to have, at least for your cooktop area, a counter somewhat deeper than the usual 24-inch kitchen depth—say 30 or 32 inches deep—or would be using an freestanding “island” for your cooktop, you could easly use many of the nominally “commercial” units that otherwise are awkward in residential uses, in that two of them front to back exceed that standard 24 inches. Alternatively, if you have generous countertop width, you could spread out four or more commercial elements side by side over six or seven lineal feet, using the 10 inches or so of space behind the units creatively. Or, if you really want to get creative, you could even use bathroom cabinetry—which is just like kitchen cabinetry except 30 inches high instead of 36—for the cooking area and put freestanding commercial units there, units that you could shuffle around, and even take with you if you ever move; that way, if you can typically get by with, say, three cooking zones at a time, you could stay within a 4-foot width and, if you ever need more zones, pull out a spare or two and put it or them on the regular countertop. Only your imagination is the limit—well, your imagination and the high-power wiring that commercial countertop units need.)
So begin your planning by deciding how much countertop space you feel you want or need to occupy with your cooking area. And if you aren’t really pinched for space, let your imagination soar.
(If you are considering replacing an existing “slide-in”—a one-piece range/oven unit—it’s important that you read our page on replacing stovetop/oven combination ranges with induction equipment.)
You can’t get out what you can’t put in. A cooktop can be rated for ever so many watts, but it will never be able to supply more cooking watts than your electrical wiring can actually feed it (without blowing a fuse or tripping a circuit breaker). Unless you’re in the highly unlikely position of having 400- or 440-volt multi-phase service available (normally found only in commercial food-preparation facilities, if then), your cooking-area power will typically be supplied at a nominal 230 or 240 volts (the difference is not material).
Presumably you’ve read our little primer on electricity, but in any event, here is the gist as a rule of thumb:
(Most modern units quote power levels based on getting 240 volts, and will simply supply less power proportionately if the voltage level dips, meaning that such units do not increase their current draw to “make up” for lower voltages—meaning that they will not blow your fuse or circuit breaker if the voltage dips.

The minimum circuit capacity you’re likely to have is 30 Amperes, which translates to 7.2 kW maximum available power. In the U.S., there is really no “40-amp” circuitry, because the next wire size up from what can carry 30 amps is capable of carrying 50 amps; at 50 amps, you’d have 12.0 kW to play with. It makes a world of difference: if you are stuck with an older home with 30-amp wiring for the cooktop (and you can’t afford to rewire), your choices are going to be pretty limited; with 50-amp service, the world is your oyster. So be absolutely, positively sure you know what you have before you ever start looking at particular units.
And, as we ceaselessly point out, whole-unit power maxima are very often substantially less than the nominal sum of the individual elements’ rated powers. (To also repeat: that’s not cheating—because few cooks ever have occasion to try running all four elements at maximum simultaneously, “power sharing” is quite useful. We just have to remember that the unit’s total power is not, for such units (or those with “boost” capabilities, a similar feature), the apparent sum of the elements’ individual maximum powers.)
But suppose you do have only 30-amp wiring and are interested in a 7.4-kW unit: is that out of the question? Not necessarily. There is some anecdotal field evidence that units do not consume quite the power that their makers claim, or that many household circuit breakers are conservatively rated, or both. But our advice is to not buy any unit whose stated whole-unit maximum power exceeds that “amps times 0.24” guideline unless either the maker (preferable) or the retailer (less preferable) puts it down, expressly, in writing, that the unit is OK to use on a circuit rated at X Amperes (where X is whatever you actually have available).

Obviously, if you are in the design stage and can control the kind of wiring that will be put in, you should go for 50 amps rather than 30 (we wish we had thought of that a few years ago). But don’t go crazy needlessly. This is not a contest where the kid with the most watts wins. Ask yourself how much power you really need for the way you cook. If you’re new to induction, keep in mind the rule of thumb from gas-energy values: induction-element kW times 7185 equals gas in BTU/hour. If you have an induction element rated at a mere 2.3 kW, that is equivalent to a gas burner rated at well over 16,000 BTU/hour; by most cooks’ standards, that’s a lot of cooking firepower!

If you have a unit that can put out a conservative 7.2 kW, that’s at least (we’re conservative here with our equivalency numbers) like having four equal-sized gas burners of roughly 13,000 BTU/hour each. Some typical “monster” very-high-end home gas units have outputs “as high as” 18,000 BTU/hour; that’s roughly 2.5 kW in an induction, no big deal at all even at the lower-price end. Indeed, the very cheapest per-watt 4-element induction unit has a 2.4-kW element, and the capability of running—for at least enough time to, say, boil a large pot of water—an element “boosted” to a full 3.7 kW, well over 26,000 BTU/hour! So, again, don’t go crazy over-estimating how much power you need. Get as much as your wiring will support; but if you’re putting in new wiring, unless the price differential is small (and copper is expensive these days), 50 amps is all that you’re ever likely to need.
(No induction units sold today require more than a 50-amp circuit, and it’s unlikely that anything needing 60 amps will come along any time soon—if ever.)
The great majority of induction units sold for household use have very similar feature sets; nonetheless, similar is not “exactly alike”, so you need to think about what, if any, “extra” features are important to you.
The standard feature set typically includes “pot recognition” (elements will not power up unless there is a substantial ferrous mass on them, typically a 5-inch-diameter pot, though some will recognize a 4-inch pot); overheat protection (the elements turn off if they are getting too hot, as by being run wide open for some while with little or nothing in the pot or pan); “childproofing” (a way to set the controls to be inoperative till a code is entered, or some other scheme to keep little hands from doing mischief); residual-heat warnings (while induction heats only the pan, not the cooktop surface, the hot pan can itself heat up the surface, so that when you remove it the glass can be hot to the touch—these things have a little light to warn you if an uncovered element region is hot); and spill protection (the elements will shut off if liquids are detected on the cooktop surface, indicating boilover). Not every unit necessarily has each and every one of those features, and if one or another is really important to you, you should check, but most units have all of them. We have, frankly, been less than assiduous in cataloging unit “features”; we doubt we’ve mentioned anything not there, but we may omit some features of some units. As to other less-standard things:
If black makes you puke, you’re going to have an awfully small set of choices (not none, but few—and all those are either grey or the new “metallic” look); that’s just the way it is.
Edge trim can be stainless steel or, for some units, simply a bevelled edge; both kinds are meant for “drop-in” installation, where the unit slightly laps its cutout in the countertop. The other option, available on some units, is untrimmed “frameless”, which is meant expressly for a flush installation (which is pretty but costs a deal more for installation). If the type of install and trim is important, pay attention, because—to repeat—by no means do all units come in all three flavors. Most come in only one, or at most two (frameless is especially hard to find). When looking, remember that many times units with different model numbers are just the same unit with different trim options; that can be a simple suffix to a basic model code, or a whole different model number.) Caveat emptor!
Almost all units have “touchpad” controls set into the cooktop-glass surface of the unit; beware any that don’t, in that their listed “width” may well need to be reduced by the space allocated to the control knobs or sliders or whatever. Most people really like touchpads: they’re easy to operate, and a snap to clean (being basically part of the cooktop surface), but some people just are wedded to knobs, which are scarce on residential-type induction units.
Another feature that some but by no means all units have is pot-size recognition (which is not the simple pot recgmnition described above). The makers claim that the units’ elements will adjust their coverage to fit the size of the pot. The most obvious form of such detection is elements that are “dual zone” (or, occasionally, even triple-zone), meaning that the element comprises an inner, core element surrounded by a secondary ring (these are invariably marked out very clearly in the unit’s surface as two concentric circles); the outer ring only activates if a pan large enough to well overflow the inner core is placed on the unit. Some “auto-detect” while others provide for manually turning on the outer element. How important such a feature may be is decidedly a matter of subjective judgement.
Yet another feature that varies in availability and that, we suppose, might be useful to some, is an electronic timer. Some units have none, most have an “alarm clock” timer (rings, but does not control any cooking elements), some have a timer that can control any one element, and some have the ability to have all elements each run under independently timed control. Only you know if that matters to you: if it does, ask about it. Note that “true” timers—those that actually shut the unit down when they time out—are fairly rare (if the blurbs say “kitchen timer”, it’s a timer that does not shut the unit down at timeout).

There are also idiosyncratic features to consider: those that some one or very few units have. One such (which one sees more and more nowadays) is a “bridged” element pair, meaning that some pair of elements—typically the front and back left-hand pair—can be set to operate as a single elongated element, suitable for odd-shaped long cookware such as grills, griddles, and fish pans. Another such idiosyncratic feature is a sort of sensor that can monitor pot temperature and adjust power to keep a constant temperature (that is different from the simplistic “temperature set” sensors that even inexpensive countertop units possess, in that the common ones merely try to detect the temperature at the pot bottom, and hence are not very good at holding the nominal temperature). There are doubtless others; be sure that the makers will tout them all. The point here is to recognize the difference between what pretty much everyone has and what really is a “feature” on a given model.
Finally, if—like most—you’re buying a single four- or five-element unit (as opposed to a set of domino elements you custom-size and custom-arrange), do consider the element layout. Arrangements can vary considerably between makes that are otherwise pretty much the same in power levels and features. And this is one of those factors that doesn’t mean anything much to some people, but can be the kiss of death for others: it’s immensely subjective, but do pay mind to it and think about how you like to cook. Closely related is the question of comparitive element size (which is more or less proportional to power): do you like the big elements up front because you don’t want to be lifting heavy liquid-filled pots to the back of the cooktop? Or do you prefer them in back so you don’t have to be reacing over or around big pots to get to the smaller ones? Only you can say—but keep it in mind when you look and choose.

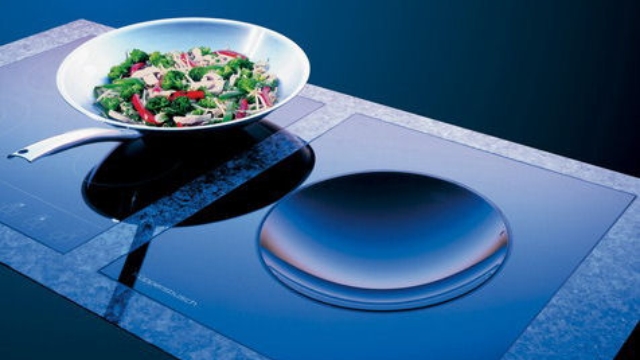
Most units have restrictions on what can go under them (meaning build-in ovens or storage drawers) and over them (meaning required free space for ventilation). If you are just going to have cabinet space below and an exhaust unit at whatever height you like above, required clearances are no issue. But if you are constrained to have an oven under or something—say a build-in microwave/exhaust unit—over, be sure to very carefully consider each induction-cooking unit maker’s specifications as to required clearances. (The illustration at the left shows how thin—vertically—induction cooktops can be.)
Most units require something from 3“ to 5” of clear space below countertop level, but some (such as GE) want up to a full foot clear. That does not mean a wasted foot of useless space: you can use the under-counter space as, for example, cookware storage, with the usual foot-deep shelf or shelves. You just can’t but a full-depth blockage, such as a utensil drawer, directly under the unit.
One of the most frequent questions we are asked in emails is whether one can put an oven under Unit X, and if so, what kind of oven? There is no universal answer. The reality is that most ovens ought to work fine under most units; but it is often very hard to get either the oven makers or the cooktop makers to agree on that. Nowadays they are usually happy enough to give their blessings to a “matched pair”, meaning a pairing of units both made by the same maker (gee, what a surprise); but when it comes to mixing brands, though we are rather better off as to information than we were only a few years ago, there is still something of a catch-as-catch-can air about the matter. You can, these days, usually find something on the subject in the Owner’s Manual and/or the Installation Instructions for a given cooktop, and we provide links to on-line copies of those manuals wherever they exist, which is almost all cases (you will find the links in the “info box”, the colored rectangle of basic data, for each particular unit). But if you have any doubts about a particular pairing, get an OK in writing from at least one of the makers.
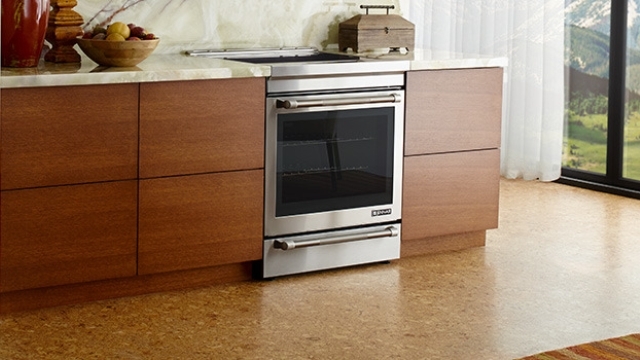
(As we point out at greater length in our page on replacing old ranges, there is no good reason why one’s oven should be under one’s cooktop—that is just a legacy from the days of yore. The same amount of kitchen space is much better used when the oven is wall-mounted and what was stored in the wall is stored under the cooktop. If you put in a wall oven, your knees and back will thank you for the rest of your life.)
Be aware that posted reports from consumers suggest strongly that retailers and even customer-service representatives of makers very often don’t know their elbow from a hole in the ground on this topic, but will nevertheless blithely give out 100-percent incorrect information. If you’re having a design issue—you feel you absolutely, positively must put this WhoosieDoosie-brand build-in wall oven under your cooktop, but the maker of one or the other (or both) says you can’t (or, more likely, that doing so will void their warranty), check, re-check, and re-re-check with higher-level people, and check the internet for others’ experiences.

Now that you’ve done your homework, and developed the meshes of your filter, it’s time to apply that filter. That will require some work on your part, but you’re buying a very important item, so put in the work. One place to start is your one or few preferred applianc e retailers: see what units they carry, make lists, and filter those lists with the criteria you’ve developed. The countertop-width and ampacity-requirements filters are “hard”—that is, there is nothing subjective about them. Feature sets and especially layout are quite “soft”, and there (and possibly on Clearances) are where you may need to spend some time. But the odds are that even at the end of your filtering, you may have several candidates left.
It is here, and (we think) only at this stage that you need to look at the financial criteria. With only a few notable exceptions in each direction, units are not wildly different in price. The notably expensive few are typically selling an “image” more than they are selling hardware, and if you are looking at any of those—we mention no names—you should ask yourself how much mere “bragging rights” are worth to you. The notably cheap few are usually, well, notably cheap, in more than simple price. You don’t always get what you pay for—but you never get what you don’t pay for. Think again of how the cost of an appliance amortizes over its 15- or 20-year (or more) lifetime. What is the difference in price worth to you over those years compared to the pleasure of having the unit that’s right for you? That’s not a suggestion that money doesn’t matter, or that you go hog-wild; but it is a suggestion that you consider well just what is and isn’t important to you in something you will be using several times a day for many, many years.
If you are close on more than one unit, a good value criterion is the unit’s $/kW ratio: how many kilowatts of real, total unit cooking power are you getting for your buck? It’s not a number you need to be married to, but it is a useful standard of comparison for value.
And, again: give some consideration to assembling a cooking area from two (or more) two- or three-element modules. (They don’t even have to be from the same maker!)

Other than the things any informed consumer ought to know about buying anything, let us add these few remarks. First—though this is general—don’t put too much stock in either brand names or price levels as guides to probable quality. Time and again, exhaustive tests by consumer groups have shown that for virtually every kind of product, many big-name brands’ lines contain at least some so-so quality or sorely overpriced items, while some inexpensive or little-known brands stack up quite well for quality and durability. (And there is often drastic inconsistency: sometimes nearly the best and nearly the worst are from the same maker). That doesn’t mean the old rules of thumb stand on their heads, it just means they are untrustworthy (expensive is not automatically good, but neither is cheap). “Anecdotal evidence” (what a few people may tell you) isn’t an awful lot of good either. In the end, when your choice otherwise comes down to two or three brands’ products, you just have to clench your teeth and go out on the internet and do your homework on those brands’ reported quality, durability, and—quite important—reputation for customer service. That also applies to the place you may plan to buy from: price is certainly important, but it isn’t everything (especially when price differences are small from retailer to retailer, as they often are in the “white goods”—appliances—trade).
We make no assertions about particular brands’ reliability—though we have some definite opinions—but there are plenty of sources out there for the diligent inquirer. Some of those are:
 Whether you’re going to buy from a place around the corner from you or across an ocean from you, be sure, as we said before, that you first have in writing the absolutely final, total bill you’ll have for the product, taxed as appropriate and delivered to your door (and insured as appropriate). Consider also the costs of installation, though those won’t vary much from one model to another (unless you go for two 2-element units—or some other “combination” installation—as opposed to a single 4- or 5- or 6-element unit).
Finally, as to warranties: most consumer organizations (such as Consumers Union) recommend strongly against purchasing any “extended warranties”. The consensus seems to be that they are simply not worth the cost, because most major failures from defective parts or workmanship are going to occur within the standard warranty period. Also, keep well in mind that many credit cards, as part of their benefits package, automatically double the maker’s warranty for any item bought with the credit card in question; check your card, or call its issuer, to see if it includes that benefit.
Now that you know how to pick out the exact unit (or units) that meet your needs and tastes, next comes the issue of how best to buy. And to help you with that, we have a page of buying information and advice.
Advertisement:
Advertisement:
All content copyright © 2002 - 2026 by The Owlcroft Company.
This web page is strictly compliant with the W3C (World Wide Web Consortium) Extensible HyperText Markup Language (XHTML) Protocol v1.0 (Transitional) and the W3C Cascading Style Sheets (CSS) Protocol v3 — because we care about interoperability. Click on the logos below to test us!
This page was last modified on Monday, 22 January 2024, at 1:50 am Pacific Time.